Introduction to the Series
Angular is one of the most popular frontend frameworks. It is an opinionated framework and comes with basically everything a developer needs in order to start developing web applications. Companies that use Angular include Google, Samsung, and Deutsche Bank to name a few.
Some of the differences between Angular and React are:
-
Angular is a framework, while React is a library. Angular basically gives you everything you need to start developing, while React leaves it up to you to include what you need in your project.
-
Angular imposes a structure for web applications, whereas React lets the you create the structure that you want.
-
Angular has two-way binding, while React only has one-way binding.
This series is aimed at developers who have experience with Javascript, Typescript, HTML5, and CSS. The goal of this series is to help developers who are new to Angular to get a good understanding of the concepts presented in this series in order to get up and running quickly.
Install the Angular CLI
Before we start, we need to install the Angular CLI, which helps us start our development quickly.
-
Make sure that you have Node.js installed. If not, download it from here and install it before proceeding.
-
Open a terminal window and type
npm install -g @angular/clior if you have yarn installed, typeyarn global add @angular/cli. This will install the Angular CLI. As of this writing 11.1.1 is the latest version of Angular CLI. You might be asked during the installation regarding allowing “anonymous usage data” to be shared with Google. Press N and then Enter to continue.
Create a New Project
For this tutorial, we are going to create a new project. We use the Angular CLI in order to create a new project by typing the following in the terminal window: ng new angular-tutorial. We will be calling our project angular-tutorial. You will be asked about the option to “enforce stricter type checking” by the Angular CLI. For the purposes of this tutorial, it will not be needed. You will also be asked if you want to add routing. Type N. Finally, choose CSS as the “stylesheet format” for the app.
Once the project is created open the angular-tutorial folder in your favourite editor.
What is a Component?
In Angular a component is composed of a class, metadata, and a template (aka view). The class contains the code that will interact with the view, properties which contain data, and methods which contain logic. The metadata is also part of the class. It provides Angular with information regarding the component (i.e. the HTML selector name, the location of the HTML file (templateURL), the location of the CSS/SCSS file (styleURLs)). The metadata begins with the @ symbol. Finally, the template displays to the user the data that has been passed from the class to the view, along with styling the view using either inline styling (using styles instead of styleURLs) or from an external CSS/SCSS file.
If we look in the src/app folder, we can see the application’s main component files app.component.ts, app.component.html, app.component.css, app.component.spec.ts. This last file is used to write out tests for the component. The convention in Angular for component filenames are NameOfComponent.component.{html|css|scss|ts|spec.ts}.
Creating a Component
Let’s create a new component. In the terminal, switch into the application’s directory (angular-tutorial) and type the following: ng generate component home. What we are telling the Angular CLI here is to create a new component for us and call it home. You do not have to type out generate and component, you can simply use shorthand g for generate and c for component.
The Angular CLI will create our new home component located inside the home directory. Angular places every newly created component, unless otherwise told not to do so, inside a new folder using the name of the component.
If we open the home.component.ts file, we will see the parts that make up the component that we discussed above:
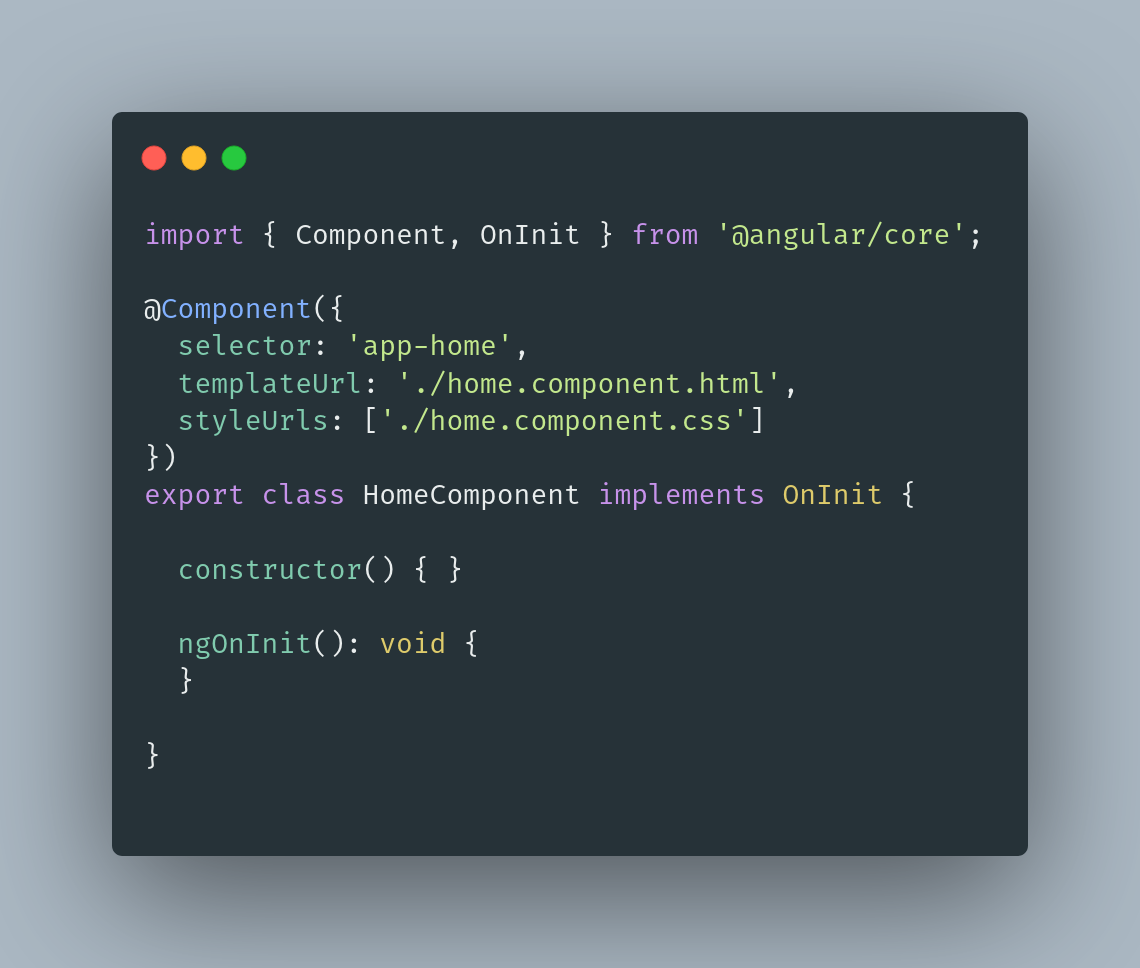
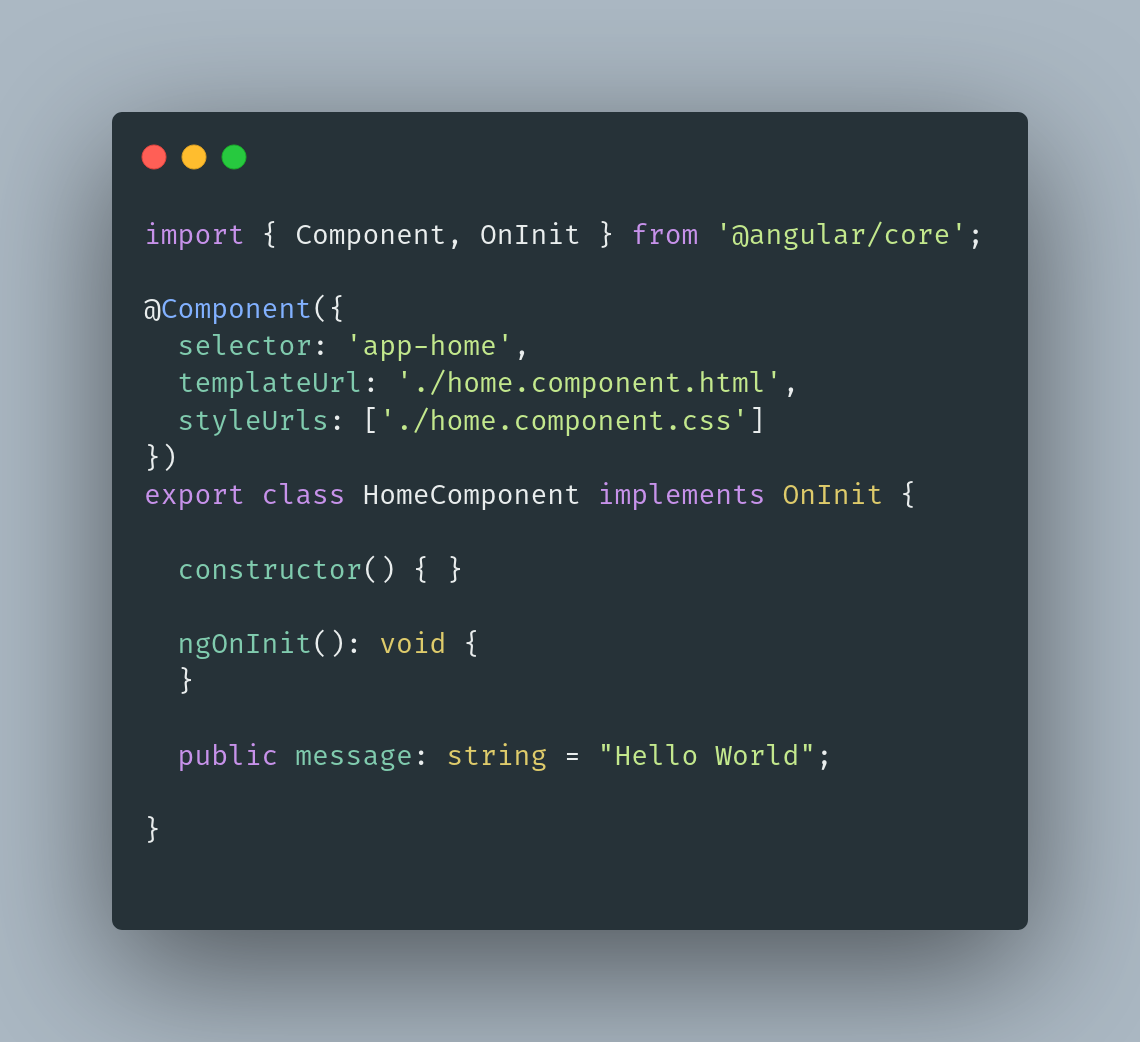
Inside the class, you will see a constructor and ngOnInit. The constructor is used in the instantiation of an object. ngOnInit is used when initializing the component. It is part of the Angular lifecycle (this will be covered in a future blog post). For now, we won’t use any of these. We will simply output a simple string to the view to show how the components work together. Simply type below ngOnInit public message: string = "Hello World"; like so:
Now, we head over to the HTML file for the home component (home.component.html), replace the default message Home works! with the following in between the paragraph markup: <p id="message">{{message}}</p>. These brackets {{}} are called text interpolation. It tells Angular not to treat what is between those brackets as simply a static property, rather to treat it as a dynamic property.
The message will not appear yet in your browser because we have to inject our home component into the app’s main component. Open app.component.html and remove everything in the file. Now here is where we use the name of the selector for the home component that is located in the metadata area of the home.component.ts file. If you recall, when we discussed components above, we talked about metadata. The metadata for an Angular component contains information regarding the component. Inside the home.component.ts we find that the selector is called app-home. We copy that name and insert it into the app.component.html file like so: <app-home></app-home>. This tells Angular when it starts up to use the home component as the first component the user interacts with on launch. Save the file and type in the terminal inside the angular-tutorial directory npm start or yarn start. You should now have a local Angular server running on your machine on port 4200. Simply copy the link outputted by the CLI and paste it in the browser. The message should now appear.
Style your Text
Next, let’s try to style our message. Open home.component.css and insert the following:
#message {
    text-align: center;
    color: blue;
}
Save the file and now your text should be centred and its color should be blue.
Conclusion
That is all for this tutorial. I hope that this was a good introduction to components in Angular. Should you have any questions or feedback, please feel free to email me.