Introduction
When add routing to your app, you might want to protect some of these routes from unauthorized access. Route guards help you protect your routes by defining who is allowed to access certain routes.
Create a guard
Using the Angular CLI, you can create a guard for your project by doing the following:
ng g guard nameOfGuard
Angular CLI will then ask you what type of guard you want. Choose the one you want and press enter. Below, we discuss the different types of guards available in Angular.
Types of guards
There are several types of guards available in Angular. They are:
CanActivate- This is used to see whether a user can visit the route that uses this.CanActivateChild- Used to check if the children of a particular route can be accessed by a user.CanDeactivate- Used to check if a route can be exited by a user.Resolve- Data is retrieved before the route is activated.CanLoad- A check is carried out in order to determine whether the user can use a route that is routed to a lazy loaded module.
CanActivate
The CanActivate interface that can be used to determine whether to activate or not. If true is returned, the route will be navigated to. Otherwise, navigating to that route will be cancelled.
In your app-routing.module.ts file, you add your route guard to the route:
import {AuthGuard} from './auth.guard';

const routes: Routes = [

{
    path: 'posts', component: PostComponent,
    canActivate: [AuthGuard]
}

];
CanActivateChild
The CanActivateChild protects not only the route, but also its children. An example would be the following:
const routes: Routes = [

{
    path: 'posts', component: PostComponent,
    canActivate: [AuthGuard],
    children: [
        {path: 'posts/add, component: PostAddComponent},
        {path: 'posts/:id/edit, component: PostEditComponent},
        {path: 'posts/:id/comments, component: PostCommmentComponent},
        {path: 'posts/:id/ratings, component: PostRatingComponent}
    ]
}

];
CanDeactivate
CanDeactivate is used when a user attempts to navigate to another route before the component they were on is deactivated.
A prime example of this is attempting to leave a component which contains data which has not been saved. CanDeactivate intervenes in this case and alerts the user that they are leaving the component with their data not saved. The user can then cancel navigating away from the component with the unsaved data.
Here’s how to register your route using CanDeactivate:
{path: 'articles/add', component: 'ArticlesComponent', canDeactivate: [DeactivateGuard]}
Resolve
Normally, when a user navigates to a component, the component that is loaded is empty and then the data is retrieved from the backend. The resolve guard allows specific data to be loaded before the route is navigated to. A service is created to retrieve the data and then we use Dependency Injection by injecting the service into the constructor of the component we want to use the resolve guard for.
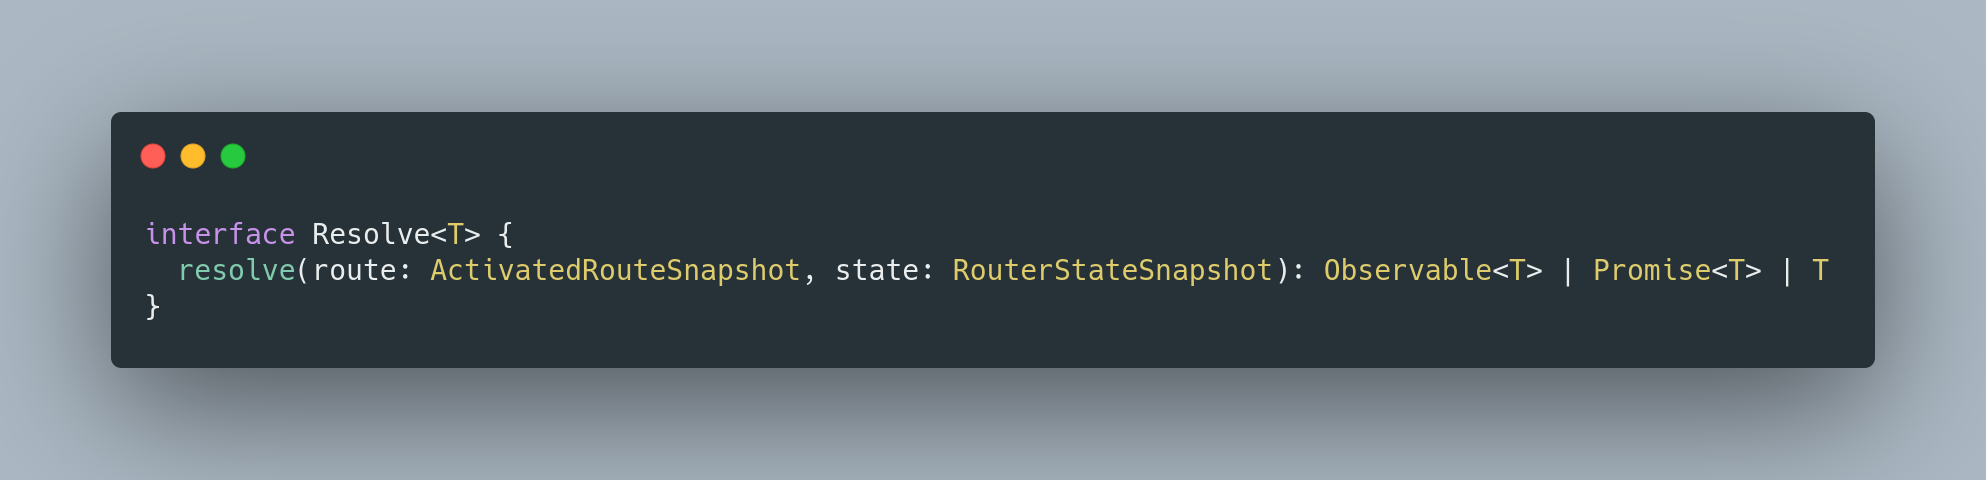
We first create a Resolve interface to use with our service:
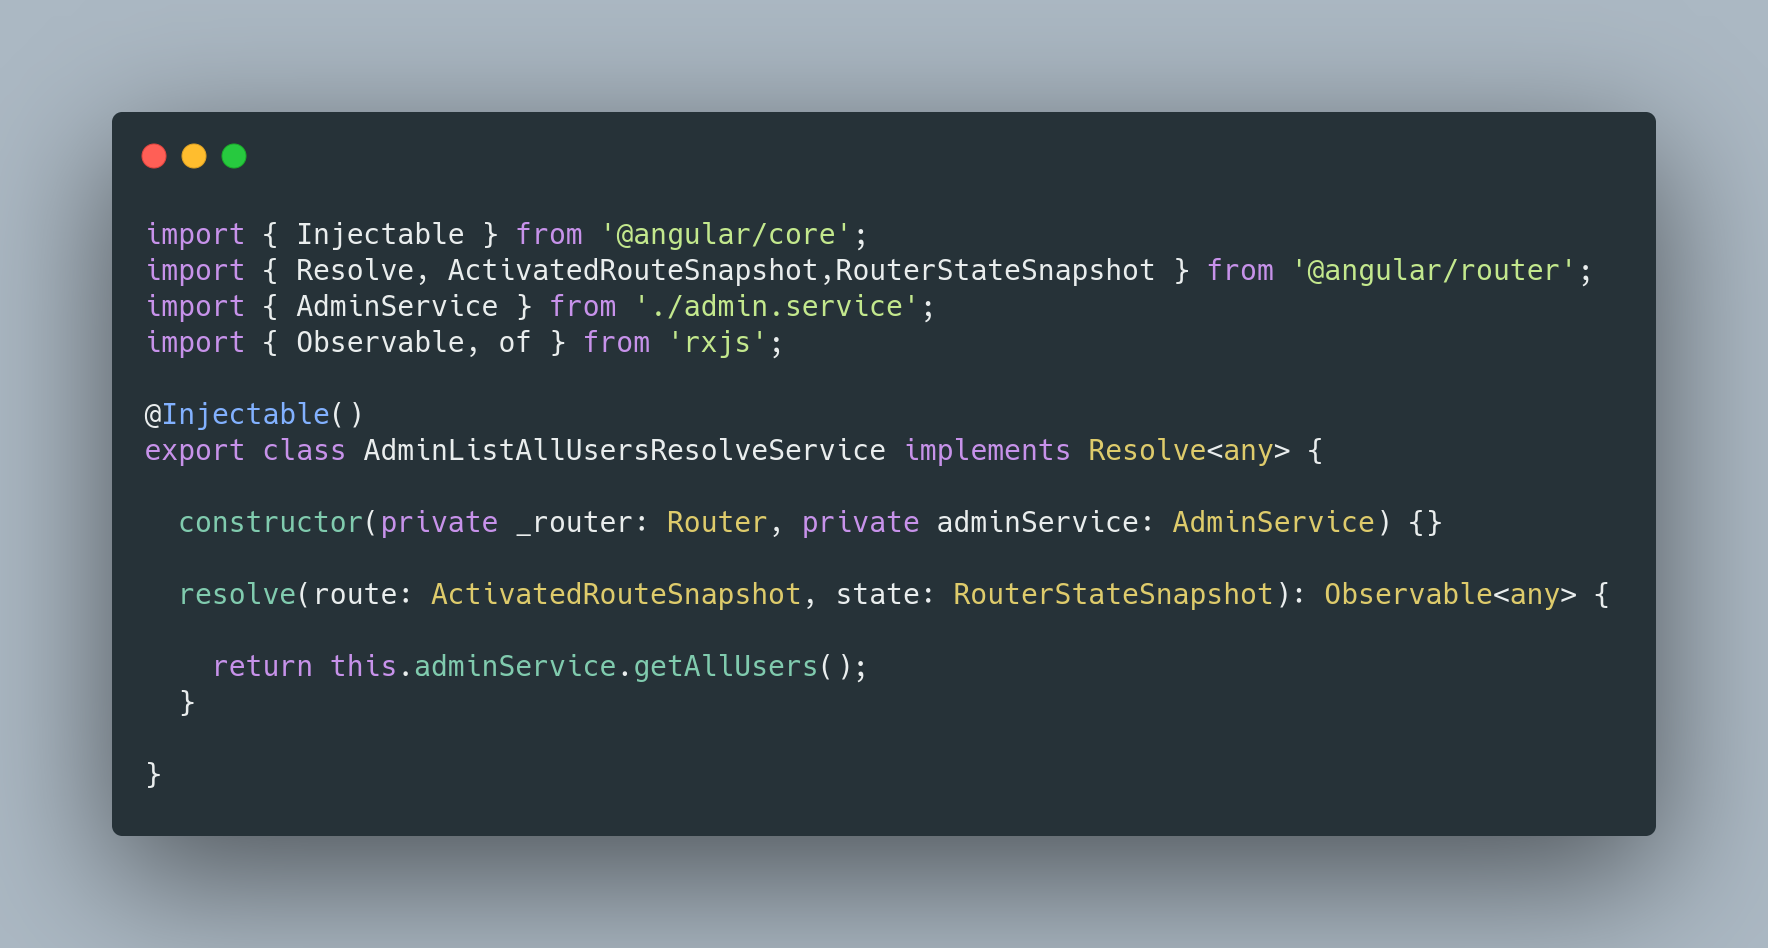
We then implement the Resolve interface into the resolve service that we created:
Since a resolve instance is not created by the router, dependency injection must be used in order to create the instance. We inject the resolve service we created above in the providers array in the root module of the application (app.module.ts) like so:
providers: [AdminListAllUsersResolveService]
Then in our app-routing-module.ts file, we then add the following for our route:
{path: 'admin', component: AdminComponent, resolve: {admin: AdminListAllUsersResolveService}}
Here we are saying to use the resolve guard using AdminListAllUsersResolveService with the route path admin (i.e. resolve: {admin: AdminListAllUsersResolveService}).
CanLoad
The role of the CanLoad route guard is to prevent the lazy load module from loading. This guard is used not only to prevent unauthorized access, but also the ability of the user to view the source code of the module by allowing the browser to download it. While the CanActivate guard also blocks unauthorized access, it allows the browser to download the module. The user can then use the developer tools available in browsers such as Chrome or Firefox to look at the source code.
Let’s use once again the admin feature for our example. We will create a module for the admin feature, called AdminModule (admin.module.ts). We will also have the a route guard called AuthGuard (auth.guard.ts). In the AppModule (app.module.ts), we will add the AdminModule to the modules like so:
const routes: Routes = [
    {
        path: 'admin',
        loadChildren: () => import('./admin/admin.module').then(m => m.ItemsModule), canLoad: [AuthGuard]
    }
]
In the admin routing module, which was created along with the AdminModule, we will add the following:
const routes: Routes = [
    {
        path: '',
        component: AdminComponent
    }
];
We leave the above path blank because the path is being handled by AppModule.
Conclusion
In this blog post we have discussed the different types of route guards provided by Angular and how to go about implementing them. In each of these examples the intent was to show how to protect your routes in Angular. Whatever type of guard you choose, you will have to write logic in the guard file to ensure that the user that is accessing the route is authorized to do so.