Here’s how to set the version of .NET Core you want to use with your project in Rider:
On Windows/Linux: Go to File => Settings => Build, Execution, Deployment => Toolset and Build.
On macOS: Go To “JetBrains Rider” menu => Settings => Build, Execution, Deployment => Toolset and Build.
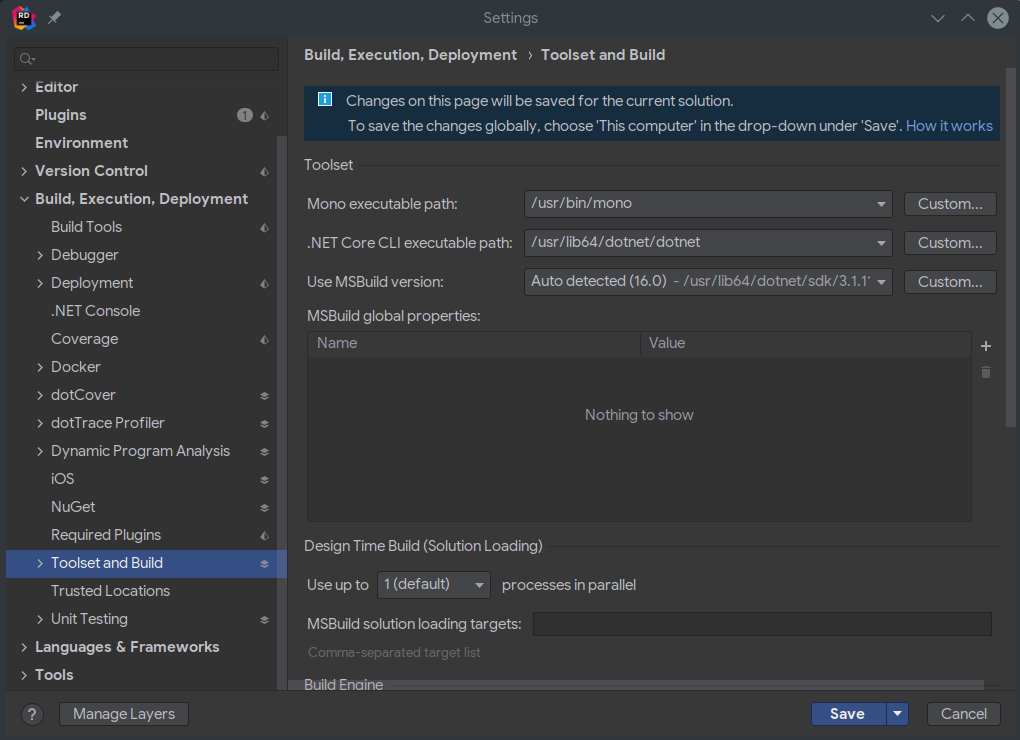
Make sure that the path is correct for the “.NET Core CLI executable path”. If not, find the path where you have .NET Core installed and set Rider to use the path which contains the .NET Core CLI.
In the “Use MSBuild version” select menu, choose from the select menu which version of .NET Core you want to use, then either click on the “Save” button or click on the arrow button next to “Save” in order to save those settings to your project (“personal” or “team-shared”) or to your computer. Now your project should be using the .NET Core version you have chosen.